Itoigawa Geopark Photobook
Record your memories and adventures in the Itoigawa Geopark
Looking for a fun way to record your visit to the Itoigawa Geopark? Download and print out our Geopark Photobook and use it to keep all of your photographs and other memories of exploring Itoigawa and the Itoigawa UNESCO Global Geopark.
Download the pages you’ve visited and add your photographs, drawings, or other mementos. Try to complete the entire book!
※Please note that some pages are not yet ready for download. They will be uploaded as soon as they are ready.
| Title |
|
||
01. Ichiburi Geosite |
|
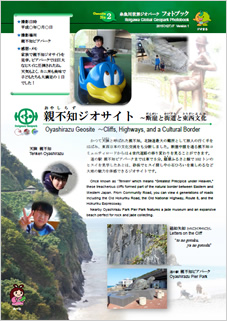
02. Oyashirazu Geosite |
|
03. Omi Coast Geosite |
|
04. Omigawa Jade Gorge Geosite |
|
05. Imai Geosite |
|
06. ISTL & Salt Trail (North) Geosite |
|
07. Maikomidaira Geosite |
08. Hashidate Gold Mine Geosite |
||
09. Kotakigawa Jade Gorge Geosite |
10. Tsugami Shindo Trail Geosite |
|
|
11. Himekawa Gorge (Oito Line) Geosite |
12. ISTL & Salt Trail (South) Geosite |
|
|
13. Himekawa Gorge Geosite |
14. Renge Geosite |
|
|
15. Itoigawa Coast Geosite |
16. Miyama Park & Museum |
|
|
17. Tsukimizu-no-Ike Geosite |
18. Umidani Gorge Geosite |
|
|
19. Amakazariyama Geosite |
|
20. Yakeyama Geosite |
|
21. Benten-iwa Geosite |
|
22. Shindosan Geosite |
|
23. Gongendake Geosite |
|
24. Tsutsuishi & Hamatokuai Geosite |
|
| Complete Book |
|
Download All (Zip File) |
|
Step 1 - Make Your Photobook!
- Using Microsoft Word
- Scrapbooking
- (1) Download the Word format versions of the photobook files above.
- (2) Open the files using Microsoft Word or a Word-compatible editing program and insert your digital photographs.
- (3) Move and resize your images as desired.
- (4) Type in the date and your comments in the box at the top left or leave this field blank and write it in with a fine point, acid-free pen after printing for a more handmade touch.
- (5) Print the file on paper of your choice. We recommend using archival quality matte photo paper for best results and to ensure your photobook lasts.
※Please be aware that we cannot offer technical support. If you have any issues, please contact the technical support for your word processing program.
- (1) Download the PDF format versions of the photobook files above.
- (2) Open the files using the PDF software of your choice.
- (3) Print the file on paper of your choice. We recommend using archival quality matte photo paper for best results and to ensure your photobook lasts.
- (4) Affix your photographs and other mementos to the page as desired. Use acid-free, archival quality tape or adhesive.
Write in the date and comments in the top left using a fine point, acid-free pen.
Step 2 - Assemble Your Photobook!
There are many different ways to assemble your finished photobook, but here are just a few ideas to get you started:
◆Staple the sheets together;
◆Use a clear pocket binder;
◆Laminate and frame each sheet for decoration;
◆Punch two or three holes in the left margin and use decorative string
to tie your photobook together.
Tools and materials for binding your photobook together can be purchased at most well-stocked stationery or craft stores. Try personalizing your photobook with stickers, craft pens, paper art and more!